Padme Meadow "Picnic Dress": Making Of
Everything you ever wanted to know about how the Picnic Dress is made. And then some. I go into great detail about my own process when doing commissions as well as the construction of this ensemble!

Special Note: I was aided immensely by all of the information I found online about this dress. I decided to take the time to write this piece about my own adventure with this dress in case it helps anyone else. It’s also a great educational resource if you follow my work and want to really know my process, or if you’re a person who just wants to know more about costumery.
When it comes to specifics, a lot of the information out there on the Picnic Dress is text-only (links are broken or photos are no longer hosted). It is my hope that this reference helps fill in the gaps and update new findings. I don’t normally give out suppliers, budgets, information about labor, and other details, but I’m going to break that rule for this costume!
As you can see below, I went way over my labor hours that I expected to do. I can’t imagine how many more hours would be added to this if I didn’t already have some starting points and helpful information that other seamstresses had gathered online.
OVERALL STATS
Project Type: Commission for a Client
Estimated Time: 70 Hours
Actual Time: 195 Hours
Estimated Materials Budget: $465
Actual Materials Cost: $490
Organizational Note: I debated on whether to write this in the order I did all of the steps (which is VERY sporadic - worked on the blouse here, worked on the corset there, ran to the store…) but I thought it might be more helpful for others if I kept each piece in its’ own section.
Also... if you read through this entire thing, and are exhausted, remember that I have multiple projects/commissions like this going on at the same time -- multiple people asking me questions -- multiple people changing up my schedule and shifting work around -- and the only way to keep it all straight is to stay organized! This is just ONE project I'm writing about.
This is why I keep a costume bible for each project - to refer to during, and after, the commission is done. (If you ever wonder why I'm slow to responding to things via e-mail - it's either because I have to reacquaint myself with some detail referring to a commission I'm working on, or I have to double check/search in my e-mail for something we discussed, or I'm just so overloaded with information.... that it's hard to process giving out price quotes to all the e-mails I get each day!)
I try to make both clients and potential clients feel like they are the only people in the world and it's a one-on-one. If you read through this entire essay, you'll get a peek into how intricate these projects get, and see that it's quite the balancing act! I learned long ago if I didn't record every detail of my work - not only would I get stressed when I forgot something - but it would make everything less efficient in the long run. I force myself to document whatever I can, however tedious.
It's time to share that process publicly! Here we go....
SECTIONS
I. PLANNING & PREPARATION
II. PETTICOAT
III. SHAWL
..... 1. Pattern
..... 2. Construction
..... 3. Pin
IV. SKIRT & BLOUSE
..... 1. Patterns
..... 2. Fabrics
..... 3. Embroidery
..... 4. Skirt Construction
________a.) Pattern/Fit
________b.) Hem
..... 5. Blouse Notes
________Pattern/Fit; Mockups
________Construction
________Details
________Ribbons
V. CORSET
..... 1. Pattern
..... 2. Embroidery
..... 3. Construction
VI. HAIR ACCESSORIES
..... 1. Snoods
..... 2. Ribbons
..... 3. Headband
I. Planning & Preparation
When I am asked to come up with a price quote for a commission I have never done before, I’m stuck with a few different problems:
I can only estimate on how long it will take and how much it will cost;
I can’t overestimate hours and budget or it will become too expensive and drive potential clients away;
I can’t underestimate or I’ll be stuck spending my own money on materials and working many hours for free.
I often get stuck in the latter, because I need the work, or because I REALLY want to take on the project. And I DEFINITELY wanted to do this project.
I’ve always loved Padme’s wardrobe, and I had never worked on anything Star Wars related apart from the Chewbacca mask I altered. So, this was definitely a commission I was motivated to get, and I probably underestimated how long it would take because I was so adamant about doing it. It happens with a lot of my projects.
(I’m getting ahead of myself!). To come up with a price quote, I break down each piece of the ensemble. I then try to list all the materials I think I’ll need, major steps in the labor of creating them, and how many hours I estimate it’ll take. Then, I add them all up together. Sometimes there are key things that can change this price - if you’re using budget materials or replica materials, for example. So I try to give a range of prices when I know a client might want to be flexible with their budget.
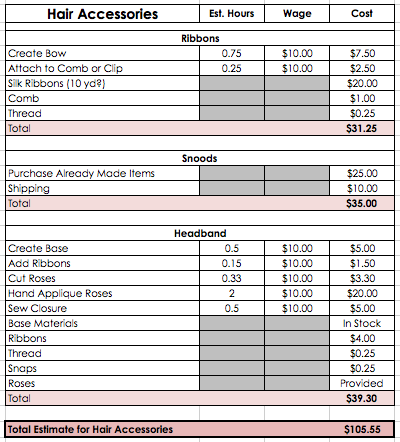
Example of just one piece of my calculations.
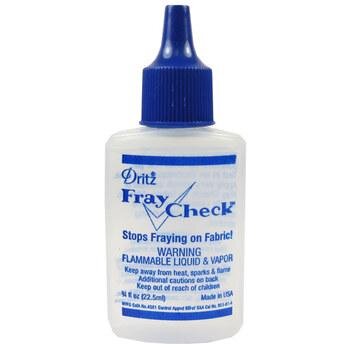
Once I get the approval and the down payment, I go to work on sourcing materials. I open a spreadsheet and list out everything I think I’ll need (taken from my original quote information). This spreadsheet gets added to during the entire constrution process as I remember, “oh! I need FrayCheck,” or “I need matching thread for this section”, or “damnit I always forget to leave room for bias tape in the budget!!!”. Finishings, bindings, closures, and other smaller details I sometimes forget, and will try to leave a miscellaneous $25 in each of my budgets for them. On the other hand, things come up in construction that change the items you use, too. I didn’t originally plan to use buttons on the sleeve cuffs, but added those in later.
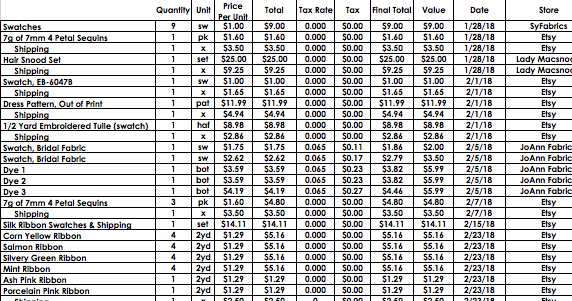
A portion of the budget spreadsheet. I take into account any tax and any discounts or sales I can find. I also have a column for "value", so if I get items on sale, I know what the materials are worth, should I have to repeat the costume without any savings or special deals.
At some point in this process I also find all the reference photos I think I’ll need, and print them out, or get 4x6’s printed because my printer SUCKS.


Sometimes, I can go straight to purchasing major materials. More frequently, I need to get swatches of the main fabrics. After I received swatches for the corset silk, blouse/skirt chiffon, and the blouse/skirt overlay, I decided the overlay choice was NOT going to work. It was cheap looking. I went back to researching materials and found a few different options, that were a few different prices. This doesn’t happen often - but because it was such a specific material and Legion guidelines are so harsh - I offered a few more expensive options to my client, and asked if they wanted to up their budget a little to get a better choice for the fabric. They agreed, because I found a wonderful fabric that would work perfectly for the overlay!
This all sounds smooth, but there’s often weeks of waiting before I get swatches, or things go wrong. Sellers sometimes send the wrong thing out, or stuff get lost in the mail. I’m lucky I have patient clients and that I leave ample time when I say a commission will take so many months to do! You have to allow yourself that time if you’re doing a REPLICA. Details are so important and often hard to match. Often these special screen and stage costumes I do use antique or vintage materials - meaning - you can’t buy the exact thing they used! It makes them special, but also hard to replicate.
The heartbreaking thing about the first overlay option not working was that it was already dyed the correct color. If you’ve followed me over the years, you might have noticed that dyeing fabrics is my absolute least favorite thing to do, and it drives me nuts. Little did I know, I’d be dyeing more than the overlay fabric… (*insert suspenseful music here*.)
I purchase what I can, and then purchase the main fabrics after they’ve been approved by my clients. I wait on purchasing threads, trims, etc until I have the other items in my possession so they can match.
When I need "plain" fabrics as-is or to tweak and dye, I get a lot from SyFabrics. They are reasonably priced.

Corset Silk
SyFabrics
Silk Dupioni 54" in "Gold"

Blouse & Skirt Chiffon Layer
SyFabrics
Georgette in "Banana"
The embroidered organza from that company, though, was not to my liking. I instead got a lucky find on Etsy from Zeng's Lace.

Embroidered Polyester Netting, WhiteZeng's Lace
Even when you get swatches, matching colors or picking out complementary materials may change. The fabric might look slightly different in a larger quantity, be a different dye batch, or have a finish to it that wasn’t noticeable in the small swatch. I adjust as I go. I’ll get into more specifics in each section about this.
Another part of the planning stage is looking at sewing patterns. Sometimes I have to draft something from scratch. But if there’s a part of the costume I know I can use a pattern for, or at least alter from a pattern, I’m going to do that. There’s no reason to reinvent the wheel or make my clients pay more for labor to have every, single, piece custom drafted. It’s enough labor to tailor existing patterns to an individual. Often the pieces that I must custom draft are bodices. The unique seam lines, lengths, fits, and other details are too unique to adapt from a pattern if you’re trying to get as close as possible to a replica. (Or if you have Legion standards to adhere to!)
Since I knew I was going to custom drape/draft the corset, I did not bother looking for a pattern for that. I did alter patterns for the blouse/sleeves and the skirt from commercial patterns. The shawl pattern was adapted from information I read about online and drafted by hand.
The next part of the process is creating underpinnings and beginning on any mockups needed for long-distance fittings. I’ll write about that in each section individually!
II. Petticoat
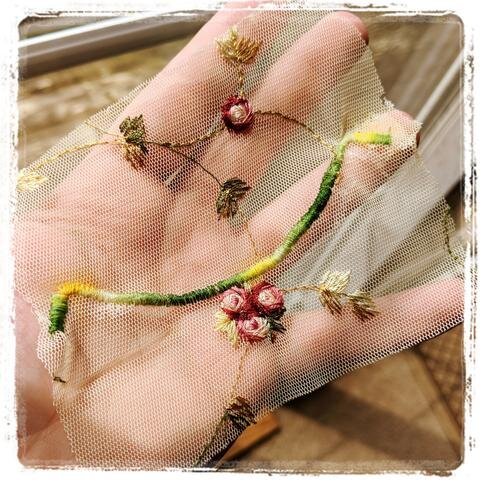
Unless I have an extremely flexible or unlimited budget, I try to cut back on areas in costumes that aren’t seen to save a client money. Or, I change details for modesty or to be more comfortable. To be specific - Padme’s skirt has different layers of multi-colored chiffons (some even baby pink) and in some lighting is almost semi-transparent. I always worry about making anything semi-transparent! What works for film doesn’t always work for cosplay. So, for a variety of reasons, I just made a plain cotton petticoat. I chose a neutral tan to make sure it wasn’t stark white underneath the semi-sheer skirt, and change the color of it.

(Without petticoat).... Direct, bright light (near the window) shows an outline of my hand, while normal lighting shows that the fabric combination is quite opaque.
The petticoat pattern is the same pattern I used for the skirt, which is a central panel for the front half, and two rear panels. It has a waistband. I don’t have the specific pattern I altered this from, because it’s one I use so often and have changed and tweaked so much. The main alteration to this pattern is making the skirt larger, especially in the waist, so I can add elastic. I like my pieces to be as flexible as possible for the wearer.

I also used this beige muslin for the blouse mockup and for the corset lining.
The construction of the petticoat is pretty simple - cut out the pieces, serge all the edges, construct the three pieces together. Leave a gap in the back for a zipper or other closure. Cut the waistband, serge the edges, and construct it into the skirt. Add elastic into the waistband, add the back closures. Hem the skirt to the desired length. I also did a decorate stitch on the hem because I can’t control being extra.

Petticoat shown with first bodice mockup pattern that was later scrapped.
__________
III. Shawl
My client actually provided the material for the shawl, as she had found a very close curtain fabric from Walmart that had the triple rose embroidery. It needed to be dyed, though. Looking back, I’m surprised at how much of the fabric I used - the shawl is much larger laid out than it looks when worn. And pretty much every other piece had roses cut out of it for various decorations on the bodice, headband, and straps.

I believe this is the same one, or extremely close.
Better Homes & Gardens Vintage Rose Sheer Window Panel
I dyed the shawl the first time when I dyed the overlay fabrics and chiffon. Then it sat for a while while I worked on other parts. When I finally came back to it, I was unhappy with how light it was.
Something that bugged me about other replicas - something I was trying to avoid - was having one part of the costume too dark or too light. This costume is INCREDIBLY hard to match, especially because 90% of my materials were polyester.
I had seen examples where the shawl or the corset were too dark or too light; the skirt and blouse too yellow.... one detail can throw off the balance of the costume. I still don’t think I got my colors perfect, but I tried my best. It was important for me to have them all in similar value like the real costume. If I could change things, I’d try to get my overlay fabric and chiffon a shade darker. The overlay and the shawl are slightly darker than her corset on the real costume.
Anyhow... the first dye was not dark enough for my taste. So weeks after I thought I was done with dyeing, I had to go to the store and get more polyester dye. And re-dye that shawl.
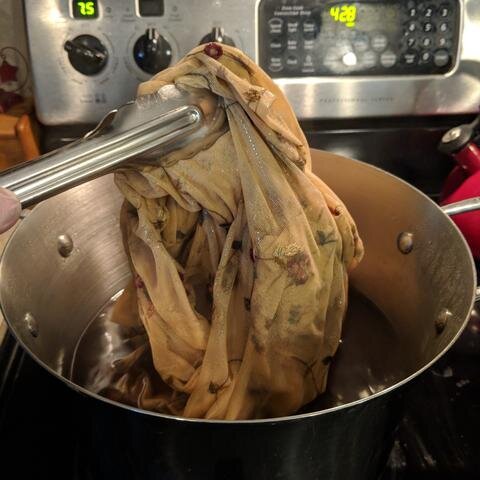
Yummy
After washing, air drying, and lightly pressing, I was finally able to work with the fabric. I came up with a pattern for a shawl that was completely wrong (it was triangular). I went online to this website and was surprised to find it didn’t look like that at all! It was circular, almost like a crescent moon. There was a resource online that had measurements of a custom drafted shawl, and I started with that. I had to extend the front pieces on mine slightly larger.

I'm borrowing the image for fear the link may get broken in the future, but please visit and reference Kay Dee's website for this! All credit to her on figuring out this pattern.
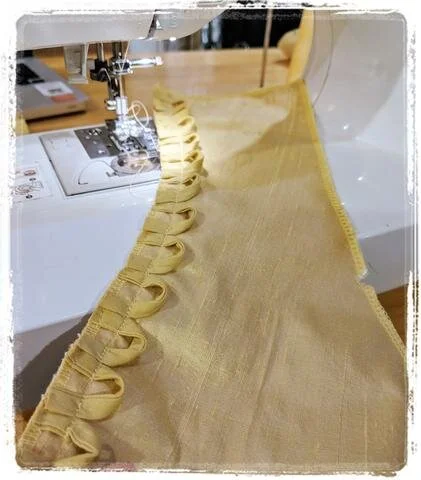
I also cut scallops into my paper pattern so I could mark them on the material. When I cut the material, I left excess, so it would be easy to embroider.
I did some test embroidery with a variegated green thread. As I suspected, this netting was too delicate and needed a stabilizer. The problem is, the thread is seen from both sides. You can’t use a simple stabilizer or interfacing that will show. If you don’t use stabilizer, the thread warps and gets all squiggly.
For projects like this, you need dissolvable stabilizer. I’ve used it before, but had to purchase more for this project (surprise!). I had enough in stock to test it out and then ordered from the ever-so-convenient Amazon Prime.

Sulky Silky Fabri-Solvy Stabilizer (say that 5 times fast)
It comes in non-sticky backing too, but for something as slippery as polyester tulle, it’s good to have the grab of the adhesive. Once that arrived, I applied it in strips to the edges of the shawl.
As I said, I’ve used this before with no problem doing machine embroidery. But, I ran into a problem doing a tight zigzag stitch on the normal sewing machine. The adhesive kept gunking up the sewing needle and then breaking the thread. I tried to clean the needles with isopropyl alcohol and re-use them as best I could, but was having a pretty difficult time. I used metallic needles, because the eye of the needle is much larger (less prone to the sticky buildup).

Image borrowed from SCHMETZ.
These needles are expensive, though. And I went through about 4 or 5 (an entire pack).

I already had these in stock, but if I had to do the costume again, I’d need to remember it’s essential to complete that part. It’s another $10-$15.
After a very long session embroidering the scalloped edge and cursing the stabilizer, the machine, the needles, and everything else, I finally finished that part. I then cut away as much of the excess sticky stabilizer, because it’s easier to wash off if less is on the fabric. It often needs two washes, so getting as much off before you start is a good idea.

Then, I hand washed it in warm soapy water and agitated the fabric against itself to remove the stabilizer. I once again let it air dry, lightly pressed it, and then began to FrayCheck the edge.
Fray Check is a watery solution you can put on the edge of a fabric to prevent fraying. It can sometimes slightly darken where it’s applied, and make it stiff, so it has to be used carefully. To prevent stiffness, it can be ironed when partially dry, but that makes a mess on the ironing board. You need pressing cloths underneath and above. I let it dry on its’ own, and ironed it after which softened it up a little. Then I trimmed the excess edge away.
Lastly, I used golden yellow fabric paint to add to the gradient on the thread.
Once this was dry, I set the shawl aside for a while, while the blouse was being constructed.

Shape of the shawl. It's larger than it looks in the photo.
When I was able to, I lined up where the clear snaps would go.
A note on clear snaps: I chose these because they are used on the real costume. I do not like them. I’ve never used them before this, and I’ll probably avoid them in the future. They can’t take high heat, they don’t SNAP closed, and they are flimsy yet hard to unsnap. Sure, they BLEND beautifully and are hidden! But at what cost?? :)

Because snaps on netting is the worst idea ever, I hand-sewed some of the embroidered roses over the 4 areas where the snaps would go. Then, I sewed the snaps in. This stabilizes them a bit more and will prevent them being ripped out of the netting.

Snap location at front, interfaced with extra roses for stability.
The finishing touch? The dragonfly pin.

Thankfully I had materials in stock that I was able to utilize for the pin, and didn’t need to buy anything extra. I used a small piece of foam and Thibra from the Camilla commission for this. I already have tons of rhinestones, paint, and gems in stock so it was easy to pick those out as well.
I used an exacto knife to cut layers in the foam, and glue them together. I made sure there was an indentation for the center gem so it would lay flat. I then applied the Thibra over the area and carefully shaped it around it. I couldn’t find my heat gun for the life of me, and I’m really wondering where it went...(!) So I used a hairdryer, which takes a lot longer. After it was nicely covered, I re-heated it and punched holes and lines into the piece to give it texture.

Next came sandable primer, a coat of black paint, a dry brush of silver paint, and touching it up with a silver paint pen. A light coat of Modge Podge was also used to seal it. All things I have in my arsenal, thank the budget gods. (I was over budget at this point in the process!)

I used to have pin backs, and thought I still did, but after searching for a while, realized I must’ve thrown them out. Instead of ordering a bunch of pin backs when I only needed one, I found one of my old employee service award pins in my jewelry. (Sorry, old job. But we got one each year we were there, so I have others….). I used bolt cutters to cut off the edges of the oval pin, so it would be hidden behind the dragonfly. Because the edges were super sharp, I used a dremel to sand the edges down to a smooth, safe edge.
I used E6000 to glue both the pin back and the rhinestones/center gem onto the foam pin.
IV. Skirt & Blouse

I already had the skirt pattern finalized when beginning this part, because it was going to match the petticoat. The blouse proved to be a little more tricky.
I originally adapted the blouse pattern from a pirate-ish shirt - you know, fluffy, blousant, puff sleeves, etc? But the sleeves were wrong, wrong, wrong. And the thought of excess fabric was something I didn’t like. I made a similar shirt for Ruby from Once Upon a Time, and I didn’t like how it popped over and poofed out of the top of the corset after a long time. (Like a fabric muffin top). So I wanted the blouse to be fitted. Most of it would be hidden underneath the corset and skirt anyhow. And, the sleeves needed changed desperately.
Using resources online, I researched suggested patterns for the sleeves. I came up with McCall 3797.

To make sure it worked, I first altered the pattern to suit my needs and created a muslin mockup. The alterations that were done were more to the bodice; I left the sleeves alone because they were very close to the original, with the exception being the cuff. But I liked the way the cuff was on this pattern, and it later turned out to have an added bonus (will speak about that shortly when I discuss the ribbons).

Blouse mockup during construction.
The alterations done to the bodice part of the pattern were to shorten it from a full dress to just a blouse, and to make it roomier so I could put elastic in the center back for a more flexible fit. It worked out great, and this mockup was sent out with the corset mockup as well for a fitting.
The next step of this process.... (inhales) was dyeing the overlay. Listen, dyeing isn’t so bad when you’re working with natural fibers like cotton, rayon, or silk. But dyeing polyester is an entire other ball game.

You have to heat the water to almost-boiling, and your dye bath size is limited to the largest pot you have. And I’m sure most of us don’t have giant, double-burner, restaurant-sized pots. The largest standard pot is usually a stew or soup type of pot. And that does not hold many yards of fabric.
This means…. Multiple batches*. More time, more stirring, more chances to have errors.
This means… Inconsistency. The dye bath gets a little diluted and you have to add a little more dye back in each time. The temperature will also lower each time and you have to wait to get it back up to temperature.
[Tangent.... feel free to skip] If you’ve ever worked in a restaurant kitchen - when you drop a load of french fries in the fryer and it takes 7 minutes, and you pull them out; then proceed to immediately fry another batch…. It will take 9 or 10 minutes. Because the heat has been transferred into the first batch of fries, and your oil temperature is lower. (I once tried to explain this to the owner of a restaurant who wanted us to use timers on the fryers. When you’re super busy in a restaurant, timers aren’t accurate! You need the human element to assess whether the item is properly cooked. But restaurant employees are underpaid and it doesn’t attract the most accurate people - I was an oddball). ANYHOW. My point is, there are usually several other factors when doing a process that you don’t anticipate. You have to be able to adapt. Something a theatre education is great for. Nothing teaches you to improvise as well as when you work in the theatre and this light has gone out, this prop has been broken, the lead’s mic has stopped working, the understudy is having a mental breakdown, an actor ripped their costume, and the sound system won’t work…. all in the same night. It’s great preparation for wedding disasters, too. Ah.... the flexibility of the theatre. It teaches you so much more than you might think. You can argue you have to improvise in any job. But trust me… I’ve worked many types of jobs in different fields, and no field has stuff going wrong left and right like theatre. It’s because there’s no budget and all your equipment is ancient. Things go wrong in the technical world but more money is generally invested into those types of jobs, and you have more resources to fix problems. I digress! [End Tangent...!]
I need to stop planning and testing when I dye, because it ends up not helping me. I always have a master plan where I write down formulas, grams, ratios, times, etc for swatches. But the reality is, unless you’re dyeing a small amount of fabric, all of that is going to change with multiple batches. The more you know. Planning certainly doesn’t hurt, but I didn’t forsee this issue until later.


This photo shows an alternative option for the overlay.

Initial dye tests (I don't think they eventually came out as dark) vs original fabrics.
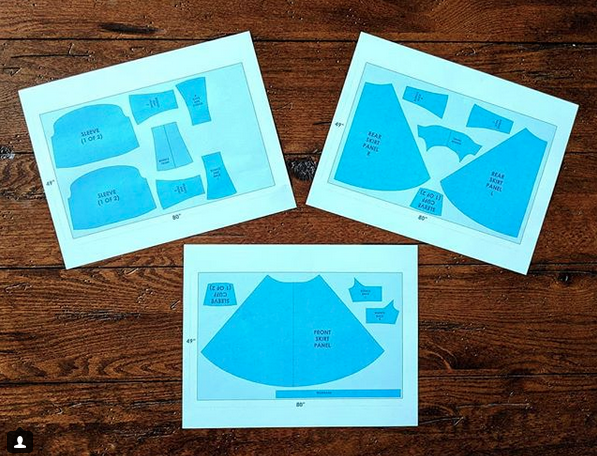
*Back to multiple batches. I have large skirt pieces to dye, and lots of smaller blouse and sleeve pieces. I need to cut my 8 or so yards of fabric into sections for each dye bath. But how should I cut them? What if I cut a piece too short and don’t have enough fabric to make the garment? This is the same dilemma you get when a fabric you need is in pieces. CAN I make this cloak with 3 yards here and 2.5 yards here and 1 yard there, or do I NEED 6 continuous yards… etc. But in this situation, it’s with splitting up the fabric to go into different dye baths.
Bring in the computer and more calculations. I measured out all my pieces (4 for the skirt, two for the sleeves, and 10 for the bodice). I then plotted out 8 yards of fabric with the width of my overlay fabric (the most narrow out of all of them… I’d be referencing this chart with the chiffon, too, but it’s wider). I came up with a cutting diagram - I left extra space in-between the pieces in case the heat shrunk the fabric a little. I then knew how to section out my pieces into 4 sections.
Had this been a natural fiber, I could’ve used any large basin and dyed the entire length of the 8 yards. But it’s polyester. Stove top dying only. *screeching*
The other thing with dyeing, is it’s better to not dye something enough, than to dye too much. So I’m often doing multiple rounds of dyeing until I get the perfect color. You generally don’t have the option to strip the color from something and start over…. Especially with polyester fibers.
Dyeing is messy. I do it in the basement when I can. But there’s so stove in the basement. Enter…. My new induction cook top ($30 on Amazon Prime, thank you.) I’ve been using it to practice cooking steaks on cast iron this summer.
I had the genius idea to set it up in the basement, next to the …. Utility? sink. The name of that type of sink is escaping me. The sink that’s next to your washer that’s for all the gross stuff and laundry water. Then I could dump the dye and have more water and also, not worry about staining the kitchen upstairs. It's not fun to carry boiling pots of dye, that can stain anything including polyester, up and down the steps.
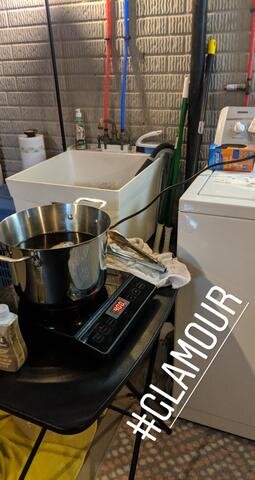
Unfortunately, my large dye pot is not 100% the type of metal needed for induction cooking. I kept wondering why I couldn’t get the water up to temperature. I was able to get it up to about 200º F, but really needed it at 210º-211º (right on the edge of 212, boiling point, for us Americans that stupidly use the Imperial system). I had this cook top turned up to 400-450º F and could barely get it to 200º.
For the rest of the world....
212º F = 100º C
200º F = 93º C
400-450º F = 204-232º C
But I figured…. 200 should be enough, yeah? No. It’s sort of enough. But it throws off your calculations and you need to dye it longer or have a more potent ratio in your dye bath.
“When am I ever going to use this in real life?” you asked in math class. Well, I didn’t ask that. Even as a nerdy kid, I liked to absorb knowledge because you can use anything you learn in the future.
“You make costumes; that must be so fun!” they all say. NOT WHEN YOU’RE DYING FABRIC.
The added *pleasure* of polyester dyeing is that you’re not just hunched over a warm pot of water stirring - you’ve got boiling water than can burn you and is infinitely harder to handle.
Let’s skip the other unpleasantries that always come up when I dye, and I’ll get back on track. I ended up having to dye all four batches of the overlay fabric twice. In this session I also dyed the shawl for the first time, which I already spoke about. It was done last, which is probably why it didn’t have enough pigment. In between the dyeing of the lace overlay and the shawl fabric, I realized my chiffon needed to be darker. I wasn’t able to achieve the darkness I needed the lace overlay to be, so I had to help the overall color along by tinting the chiffon that would be underneath it darker.
The chiffon is also polyester.

After testing a few swatches (washing, drying,... this takes hours), I tinted the chiffon twice.

As I mentioned, when it’s all said and done, I wish I could’ve achieved these pieces to be darker, to be closer to the original costume. But I think my replica is closer than quite a few others. I’m happy with it, but I’m always looking to improve, as well. So it’s a double-edged sword.

After all of these fabrics were washed in the washer and hung / air-dryed, I carefully ironed all the wrinkles out of them. I was later able to cut all of the pieces out according to my diagrams that I had planned. The fabric did not really shrink at all, but I was glad I planned for it just in case. Better safe than sorry.
The next part of this costume was the part I most underestimated - adding sequins to the overlay fabrics. They needed to be added to all the skirt panels, both large sleeves, and the top front & back of the bodice. The middle bodice would be hidden by the corset.

I may have been extraordinarily naive when I thought it would only taken 5-10 hours to do this. Well, I had never done something similar, so it’s hard to imagine. I thought about 5 hours for the skirt and 5 hours for the top. Right? WRONG

55.27 hours later I finished sequining. I listed to a LOT of audiobooks during that time. A lot.
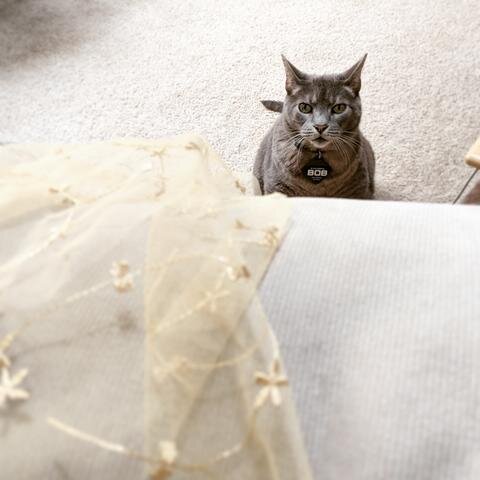
"pay attention to me, hooman"
At this point, I realized this project was going to become a solely artistic endeavor as it already lost all profitability XD.
I also did not plan this into my schedule, to be this far over hours, so I had to crunch a bit the last week before I had to ship it out. Hey, this is what I do for my clients. I love you guys. I’ll break my back for you. I won’t finish something improperly just because I underestimated it. It’s still difficult, though. It’s a balance between “I love doing this work” and “oh my god how am I going to pay the bills.” At the very least, I am in love with this costume design so that helps.
A note about sequining on netting: you always want to tie a knot before putting the sequin on. Then, pass it through the center and over to the side. Then, pass it through the center hole and knot it at the other side. Do an additional knot just in case. Then, clip the thread. Each sequin was hand-stitched this way. I used golden thread because it made it appear like the sequins were stitched through in the vines, as they are on the original costume. I didn’t get the chance to put seed beads on the flowers - (at the beginning, I thought I might sneak it in there) - but as I saw how much more labor this was becoming, I knew I couldn’t add that detail.
I believe that’s where the PREPARATION of the fabrics end, and construction begins.

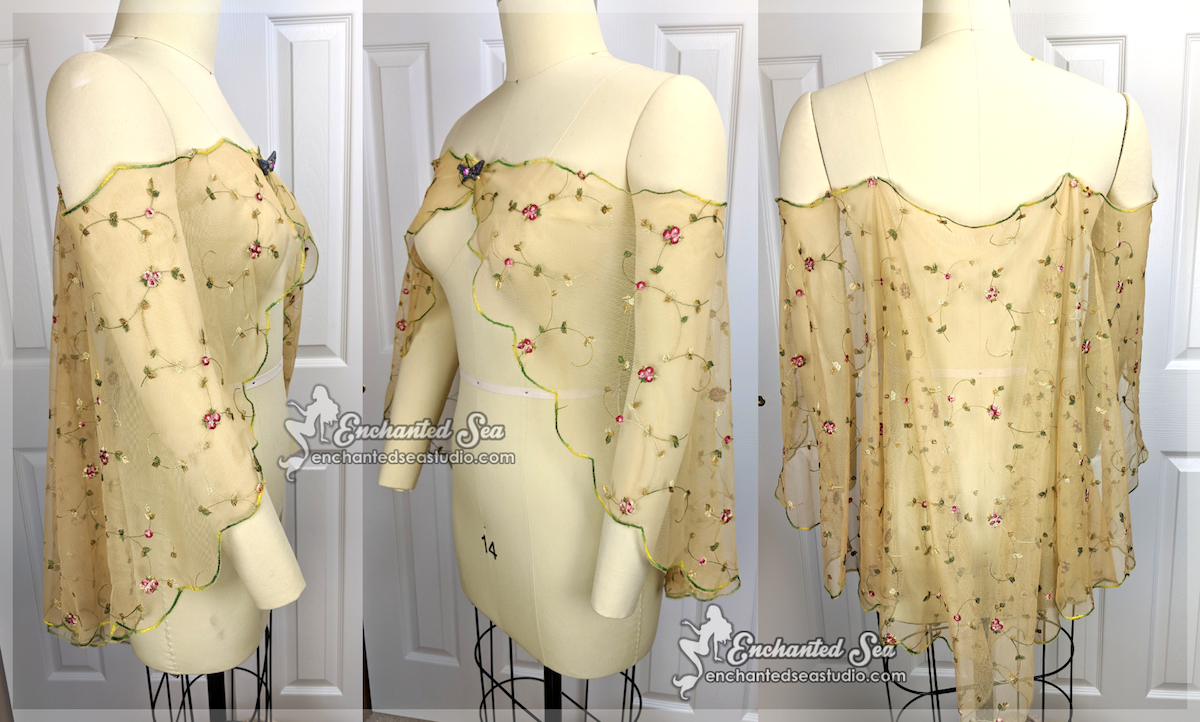
These are all the little things people may not expect with replica costumes. You can’t just get fabrics, so you have to alter and make them. But the results are so beautiful.

(Photo taken before the sequins were added)
For the skirt, I left the layers (gold chiffon + darker gold overlay) separate except for where they were attached at the waistband.
Before hemming, I let the chiffon rest and hang on the skirt. This is often necessary to get an even hem. The part cut on the bias will always hang down and stretch a little. You need to let it do that, and then re-cut the bottom edge of the skirt, to get a nicer hem. This is most prevalent on circle skirts, but there was a lot of bias at the side seams on this as well. Thankfully, the netting overlay did not stretch at all, so I had an easier job of matching them together and trimming off the excess chiffon before hemming.

I decided to use a rolled hem on my serger for these hems, as it’s faster and cleaner - less bulky and less stitching. This is done by removing the stitch finger in a serger and adjusting the tension on the upper & lower loopers. It slightly rolls and encases the delicate fabric edge.

I finished the construction of the waistband as well, and attached it to the skirt pieces. I added a zipper in the back and snap closures at the top.

For the bodice, I applied each netting layer to its’ chiffon layer. The edges were serged and they acted as one piece for each panel. There were 10 pieces not including the sleeves - Upper front, left & right upper back, two back panels, to side back panels, two side front panels, and a central front panel. The sleeves were made of two pieces each - the main piece and the cuff.

I did not worry about a lining even though the combined fabrics are semi-transparent in bright light, because the corset would cover up anything below. The very top of the neckline and the arms are OK being shown through. I did need to line the cuffs to complete proper construction, though, which I’ll explain in a moment.
Once all the pieces were together, I constructed the bodice minus the sleeves. I inserted elastic into the back waistline area and the top hem area. I hemmed the blouse as well, at the bottom. I left the blouse longer rather than shorter. I knew it would be tucked into the skirt. But sometimes, a blouse will need “smoothed down” or pulled down after wearing it under a corset for a long time, and I wanted the wearer to be able to pull down the blouse easier. Making the blouse hit about mid-thigh helps this, rather than it being stuck squished underneath the corset. I’m always trying to think ahead and improve things if I can.
The sleeves have a channel at the top made from hemming that encase elastic, and then the central channel must be made from bias time. To match, and to save my budget, I made matching narrow bias tape out of the chiffon. I carefully pinned it and stitched it on the reverse side of each sleeve. Then, I inserted the elastic in. The bottom of the sleeve, where it meets the cuff, has gathered stitches rather than elastic.

Matching bias tape out of..... georgette! That's a first
The cuffs seemed simple enough in the mockup, because I didn’t have to properly finish them. I realised to finish them nicely, I had to add a lining and construct them a little differently. It was harder, because they close by almost overlapping with velcro or with buttons and loops.

My client preferred buttons, so I created bias loops out of matching chiffon. I found satin-covered bridal buttons at the store and used some matching dye to tint them to the correct color.

Once the sleeves were complete, I inserted them into the bodice structure, and finished off any top hems of the bodice. I created spaghetti straps out of the matching chiffon, and stitched them in. I also added a few of the rose appliques that are present on the real costume straps.
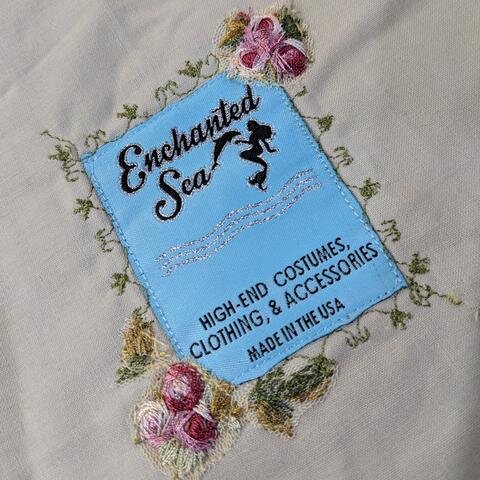
The last detail was stitching the buttons on by hand, adding a clothing tag, and adding the other set of snaps near the spaghetti straps that would hook up to the shawl.


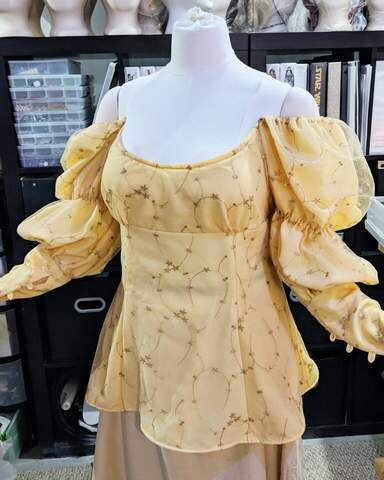
This photo was taken before hemming and a few other steps like the buttons, straps, etc... but shows the pieces almost complete.
Did you assume I was done? You’re forgetting about all the ribbons attached to the bodice! I was silently dreading figuring those out, so I actually left that task for the final day I was completing the costume.
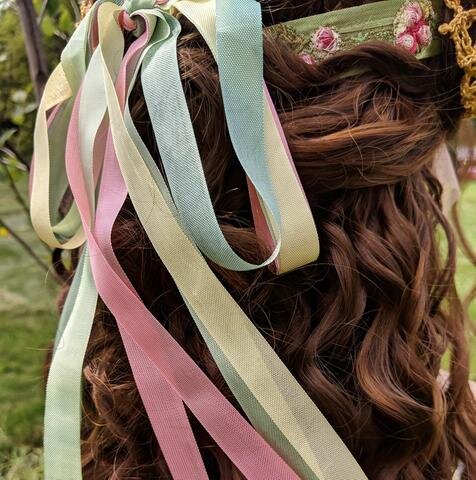
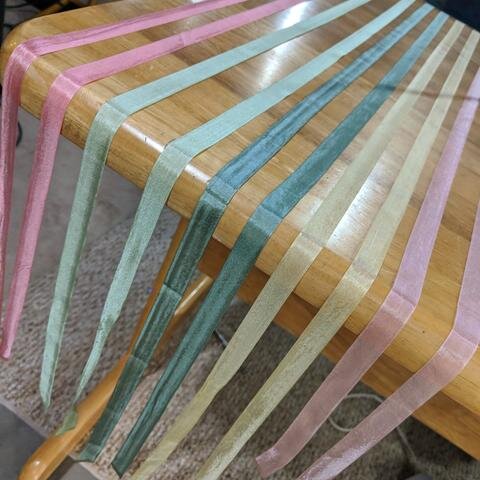
I need to write a small love letter to these ribbons. They were a marvelous find. From the very beginning, when I was studying others’ notes on this costume, I knew that plain satin ribbons weren’t going to cut it. I also knew that sheer ribbons weren’t going to work either. They’d both look cheaper, some would be heavy, neither would have the correct texture or transparency. So I spent a lot of time researching silk ribbons. And I say silk, but ended up buying rayon ribbons. They feel as delicate as silk, though, so I often refer to them that way. An Etsy seller inherited a huge stock of antique French millinery ribbon from the 1940s and had plenty of different color options. I purchased about 12 or 14 samples of color before I purchased all that I needed - I didn’t want to make the wrong choice and lose money. I tried to get about 10 yards of each based on what was available. I’m glad I read that other costumers tried using 8 but would’ve preferred 10; it gave me guidance on the amount to buy. I also had a few extra yards in a different color for the green headband.

I used pretty much all of the yardage I purchased of the ribbons! So that was a good call. Now, I had to figure out how to attach them. There’s a set of ribbons at the middle arm near the elbow, and the section that wraps around the sleeve cuffs near the hand. There’s also the hair accessories. I tackled those first, to get more comfortable working with this beautiful ribbon. (More on that in the accessories section).
Let me just say again, this ribbon was perfect. It looked so much like the silk ribbons used in the real costume. The texture, the semi-transparency, the colors, the weightlessness and flow…. Just perfect. I’m really happy I didn’t skimp on that part. It would’ve been too easy to just pick up cheap ribbon in the store.
The mid-arm area ribbons and cuff ribbons were cut to length, FrayCheck-ed on the ends, and trimmed.
For the mid-arm area, I’m not sure if I used about 3 yards (?) of each color. I gathered them together similarly and tacked them to the front area of the sleeve. I read that the real costume had them attach with clear snaps (grinds teeth) at the rear of the sleeve, so I carefully arranged them and tacked them down carefully, then added snaps near the back.
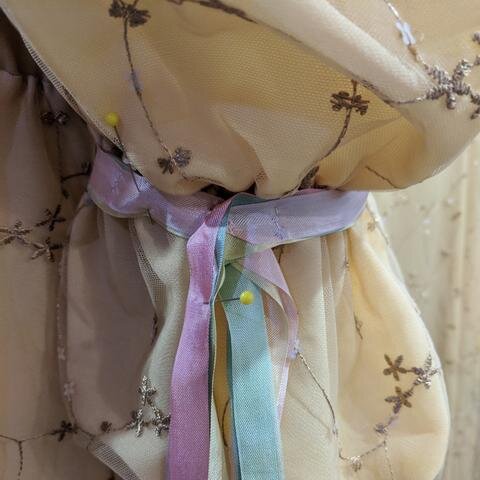
I didn’t want them to be too tight for my client, but didn’t want them loose either. I solved this problem with two little thread loops, that the ribbons could be guided through. They could be pulled tighter or stay looser and they wouldn’t sag. If desired, the ribbons could just be tied in the back tightly as well, and the snaps not utilized.

I debated on how to attach the ribbons to the cuffs. I read that others had tried to tack the ribbons down on the bodice but it turned out terribly. I wanted to leave a lot of them loose, but didn’t want it to be inconvenient for my client. The center arm ribbons were a good compromise, but the cuff ribbons are more complex. After pinning and experimenting, I decided to utilize thread loops again. I cut about 4 yards of each ribbon and stitched them together in the center. I had a thread loop at the top front of the cuff and top rear of the cuff that I fed the ribbons through.

The ribbons are removable if need be, but can stay on the costume before tying them too.
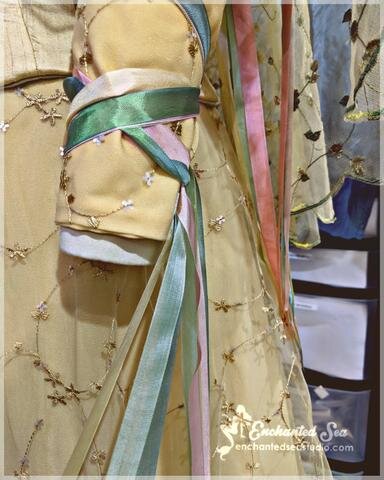
I previously mentioned the buttons gave me an extra bonus. This is where that happened: As I criss-crossed the ribbons over the buttoned/closed cuff, I realized that the ribbons stayed in place better as they were “trapped” from sliding down at each area there was a button. This solved my problem of wanting the ribbons to stay in place, but not wanting to permanently tack them down! I was very happy about that. So I left the ribbons that way, and they are manually tied off at the bottom wrist area.

And I thought the lengthiest part of this costume was going to be the corset! But the blouse and skirts beat it by a long shot. Woo-wee.
In case I forget to mention it at the end, when I was taking photos of this costume outside, the ribbons were so delicately floating in the breeze. It was one of those small things in life that brings a smile to your face. It was so ethereal. I’m sure I sound hilarious, but it was so beautiful and a detail that I’m really happy about.
________
V. Corset
At the very beginning of this project, I draped and drafted the corset from scratch on my dress form, which was padded to the correct measurements.

I created the mockup out of duck cotton and steel boning, and it was sent off for a fitting.

It came back for a few alterations and was sent back out for a fitting with the accompanying blouse, which was perfect!

I tweaked the pattern as necessary, and proceeded to the embroidery.
The corset was worked on after the blouse and skirt were constructed but not entirely finished (hems weren’t done, closures weren’t on, and ribbons weren’t even attempted). I was a little behind schedule at this point so the task of the corset embroidery was daunting, but I was willing to take on the challenge.
I mention that I was in a little bit of a time crunch at this point - so my process was a little all over the place here. Many problems arose, and it might sound silly with how much I had to run around, but it was stressful! I conquered it, but it was not the ideal process to get the end product. (It rarely is).
I’m not new to embroidery, both machine and hand, but I am limited with the machine I have. I know MOST of the limitations and how to deal with them. The main limitations are:
Hoop size. The hoop is larger in size, but will only embroider a 4”x6” area. This is exceptionally tiny when you think about all the detail on the bodice. It also means you have to line more areas and more sections up.
The design detail. The software you have to manipulate to “digitize” the image is clunky and not detail-oriented. It only picks up basic shapes and does NOT do well with fine detail. Especially the “stitching” detail that surrounds all the objects on the corset and has wonderful swirling patterns.
The computer I have to attach to the sewing machine. This software is Windows-only, and my ~7 year old Mac cannot handle a virtual machine of Windows. So, I either have to bring the sewing machine upstairs and hook into our ~10 year old PC, or use this ~10 year old HP notebook I have. Neither are promising. The PC runs faster than the notebook, but I needed to work down in my studio for this, so I went with the laptop. When I say slow, we’re talking like 3 seconds or more between each click of the mouse. Much longer when it’s processing an image or doing something harder. I’ll remedy this in the future (my Mac is on death row), but I couldn’t remedy it for this project.
I debated on whether to do the embroidery by hand, as most cosplayers do - or by machine. I read that the real costume was done by machine, so I decided to try it that way. Machine embroidery is not necessarily easier - it just comes with a different set of struggles. It takes almost as long, or only shaves minimal time off of hand embroidery. But, it can be more accurate if done well. There’s pros and cons to both.
Thinking I could get the entire design to embroider, (the main pieces and all the stitch lines), I spent hours tracing the design into photoshop and adding colors to it. I utilized different photos and diagrams other people had put up online for reference.
I then spent a few more hours plotting out the sections to embroider - the 4”x6” sections. You can’t just chop the design up into sections, because it’s hard to line up all the areas together. Even a mm off looks funky. So you have to be clever with which areas you break up, and which will overlap. You even have to think about what order you’re going to embroider them in so you’re not constantly clamping over already delicate embroidered sections. It’s a lot to think about.
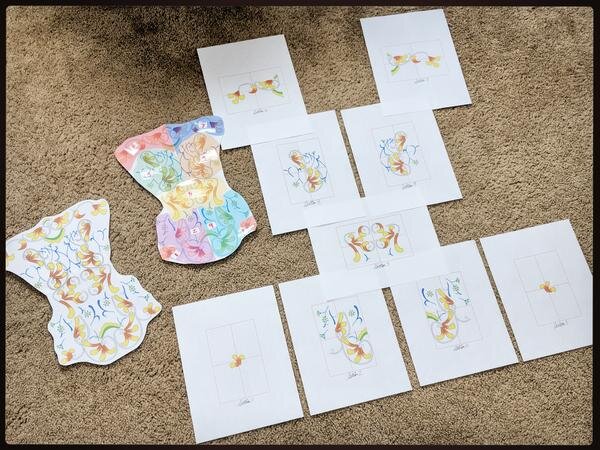
I separated the embroidery out into 9 sections. Note - the colors aren’t correct, because the software I use for digitizing designs needs VERY distinct colors to pick up shapes. So the colors are exaggerated or completely different. You adjust in your thread choice what the actual color will be.
I had to create separate image files for all of these pieces, all on the correct scale. I also had to transfer them onto my dinosaur of a notebook and work on digitizing them. The digitizing process is where the software tries to pick out the shapes, and you have to re-order the shapes, think about thickness and size, think about satin or step stitches, and a few other things. Then you have to make sure the size matches correctly. I’ve found that larger images are easier for my software to pick up detail, so I had to make the images large and re-size them in the very last step once it had picked out all the shapes.
As I was doing this with the first part, I quickly learned it was not going to pick up the brown “stitching” parts of the design. I tried to enlarge the files and it still didn’t work. So I went back to my computer and edited out all the brown lines on all of the 9 sections.
Getting the new files back on the dinosaur computer, I continued to digitize each section. I tested the embroidery, and didn’t like my thread choice of colors. I went to the store to get other thread, but returned them as well. I settled on the fancy embroidery thread that’s silky, because it just didn’t look right without it. I also had to make the three colors in the “flames” all closer to each other. Each individual color was standing out too much. I didn’t think it would be so hard to match thread, but even with ALL that thread at the fabric store, would you believe me if I told you it was hard to find exact colors? Sometimes you get what you think will work, even with swatches in hand, and it just doesn’t go together well when you test embroider it. So I made a lot of trips back and forth for thread alone. Again, I didn’t buy thread at the beginning, because all of the dying and manipulating of the fabric changes color harmonies. It had to wait until the end.
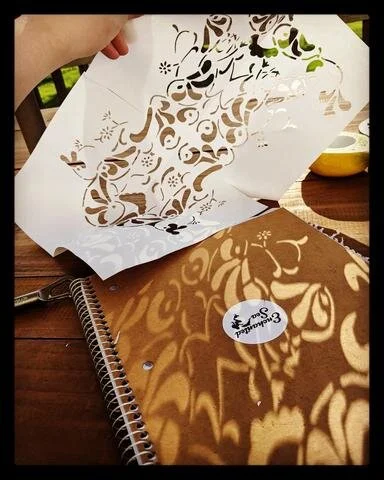
At this time, I also printed out a to-scale design of the embroidery chart I created. This allowed me to create a stencil for transferring all the tiny detail to the front 3 pieces of the corset.
Instead of embroidering the pieces individually and trying to line them up perfectly (as I did with Aminta), I decided to construct the front three pieces together and embroider them as best I could. There was still a gentle curve in the bust, but not so much that I couldn’t adjust and get a section flat enough to embroider.
I fused the back of the delicate silk with muslin and serged around each piece. I constructed the three pieces together, notched the seams, and pressed the seam as flat as possible. I then added stabilizer to the back of the three pieces to keep the seams flat, and add more protection.
Because you need excess space around the embroidered area to clamp in the hoop, I had to add sections of scrap fabric on the top, left, right, and bottom of this embroidered area. This is why it’s better to embroider them before cutting the pieces, but that’s not always the best option. It can be more accurate to do it this way.
You also need excess to stretch the fabric in the hoop and get it lined up.
Before beginning that, though, I had to transfer the pattern of the embroidery via the stencil I used. I began to be concerned that I might not be able to get the ceramic pencil (it’s like chalk, but as fine as a pen point) off of the delicate silk. I tested it and it was hard to come off. This was a major point I wish I would’ve stuck with how I was doing the process.
Instead, I tried something else. I would not repeat this if doing the costume again, but I’m going to note it for completion’s sake. I read that others had used the sticky, water soluble stabilizer on the front of their corsets. That they printed out the design and stuck it to the fabric, embroidered, and washed it off. I thought…. I already have the design in photoshop, what a great idea! Eh… it worked, but was so much more labor. I also ended up having to use chalk in the end, too. But I’ll get to that.
I had extra sheets of the sticky-back, water soluble stabilizer that I had ordered for the shawl, so that was convenient. I printed the design, which is so large it needs to be on two sheets. I worriedly applied it to the silk, but I had a small amount of confidence that if it washed off the delicate netting of the shawl, it would wash off the silk too.
I thought, “oh man, I wish I wouldn’t have wasted time cutting out the intricate stencil!” … it came in handy later on, though.

Not perfect, but close, with tons of re-adjustments.
I won’t go into insane detail about how to line up the design, because it’s hit and miss. I don’t have a fancy machine that projects the design onto the fabric. It’s literally eyeballing it, and being clever. By being clever, I mean - I traced out the hoop section, and traced each of the 9 “chunks” of the design. Every time I had to move the hoop to a new section, I tried to overlay the tracing paper and match it up with the printed design on the stabilizer, utilizing the vertical centers and horizontal centers. This is not foolproof, though. The design also has to be lined up well in the software. For each agonizing section within each of the 9 chunks, I tested where the needle was going to hit to see if I had things lined up. I often readjusted the fabric and readjusted the design in the program.
This is not a new process to me - I did things this way with the Aminta embroidery, which is how I learned it. Except - the Aminta embroidery was only one color and there was a way to get around attaching the scallops together if they were slightly off. This particular design is very symmetrical, has tons of colors, and was much more difficult.
It’s certainly not lined up perfectly - I’m going to give it within the 90% to 95% range. It’s just almost impossible to get it perfect and not spend weeks on it. At this point, I wish I would’ve hand embroidered it, because I’d have more control over it. I was going to have to hand-embroider the brown “stitched” areas anyhow.
I was concerned for the integrity of the silk, because clamping it so tight for embroidery can damage it. I also didn’t want to have that sticky stabilizer on the silk for longer than necessary. For these reasons, I got the machine embroidery done within a 24 hour period.
I mention this, because I was going to hand-embroider over all the “stitched” areas shown on the sticky interfacing I printed out. Yet, things had to be adjusted; it wasn’t lined up perfectly…. That wasn’t going to work. I was going to have to manually adjust the “stitched” swirly areas that outlined everything.
Therefore, I trimmed around all the intricate details and tried to get as much of the stabilizer off as possible. I washed it once in warm soapy water, but this stabilizer often needs washed twice. You really have to agitate it and rub the fabric against each other, especially the areas where it’s trapped under the embroidered thread. To my dismay, it also dulled the shine of the embroidery thread, but not too badly. Just a little. Had I used matte thread like I originally planned, I think it would’ve looked even worse - so I’m glad I made the thread change.

After the first two washes (still wet)
After it air dried and was gently pressed, I had to transfer the “stitched” outlines and swirls onto the fabric. There was no way I was going to use more printed sticky stuff - and couldn’t have, anyhow, with designs already stitched on. So my stencil came in handy.

The white chalk was the swirled areas, along with the green markings for the dashed lines. There's also marking around the borders of all the flames.
I used the fine ceramic “chalk” pencil to draw all the areas and all the dashed lines I had to embroider. I knew I’d have to wash it off but I was going to try to cover them up as best as possible.

This also gave me the opportunity to trick the eye into making all of the design look more symmetrical. Slightly bending a line there, or making the border come out a few millimeters there, helped even out any alignment issues.

I then (*inhales*) had to clamp the silk again while I hand-embroidered all those dashed lines (what I’m calling “stitched” areas). I also had to hand-applique all the roses cut out from the excess shawl fabric.
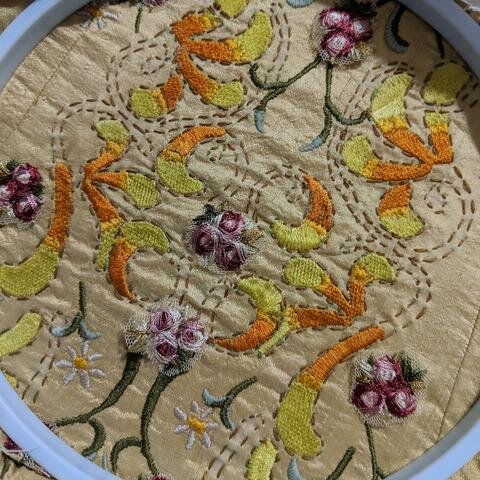
Once I FINALLY finished, I proceeded to wash off the ceramic “chalk” pencil areas. Which came off SUPER EASY with soapy water. When I tested it before, I just rubbed it with water and it was stubborn. But the detergent just took it off like a dream.

OH, how I WISH I would’ve just used this in the first place! The task was done, but I’m so much more knowledgeable now.
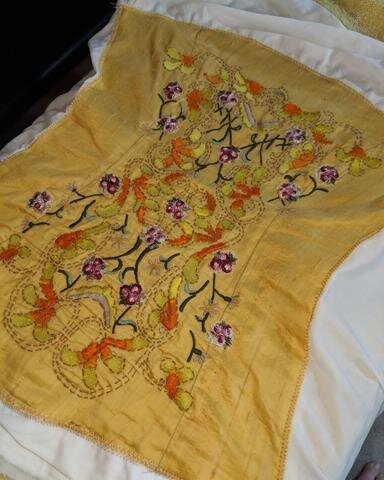
After the final wash (still wet).
So that was JUST the embroidery part of the corset. I’ll now talk about the actual construction. (Phew.)
Although corsets take a long time to construct, with boning channels, boning, lacing, lining, etc… it’s something I know well. So it wasn’t daunting like some of the other tasks I was more unfamiliar with. I had an idea of how long this section would take.

Excess muslin trimmed away, before I picked out all the stitches along the edge to detach this piece.
I first had to detach my front three embroidered pieces from the muslin I stitched around it. I carefully did that, and trimmed all of the threads on the reverse side of the embroidered design.
Then, I cut out the other silk pieces, the other interlining pieces. These were fused together and the edges serged. I created double interlinings for the front three pieces so I could sew boning channels in the centers of those panels, as well as the seams. This was attached and serged to the central three pieces.

Center front interlining piece with boning channels, before being attached to the side front pieces.
The rest of the silk-with-interlining pieces were constructed together, and constructed to the center. The seams were pressed open, and I made bias tape out of scrap cotton for the boning channels. I stitched these channels into each of the seams, and inserted almost all of the boning in.
After this, I cut double layers of the beige muslin I used for the petticoat and the mockups. I serged the pieces together, and constructed them together. I set the lining aside for now.
I had a small dilemma when it came to the bias loops in the back of the corset. I normally make it out of the matching fashion fabric. But that fabric was dupioni silk. Does it get much more delicate? And this was a high stress area. Lacing being pulled and tightened through these loops. I didn’t think it was good to use a material that can break down so fast like silk on these loops. I also didn’t have time or budget to find a polyester matching alternative. So, I took some spare cotton, ….
And DYED IT! Ahh, the dyeing never ended.

But I was done. Until…
IT WASN’T DARK ENOUGH AND I HAD TO DYE IT AGAIN.

Ok, after this, I was FINALLY done with the dye. Hallelujah.

I ironed the cotton and cut strips on the bias, stitched the loops and turned them inside out. I cut them into portions and carefully pinned the loops to the back edge of the corset. After stitching them in there securely, I was ready to add the lining.
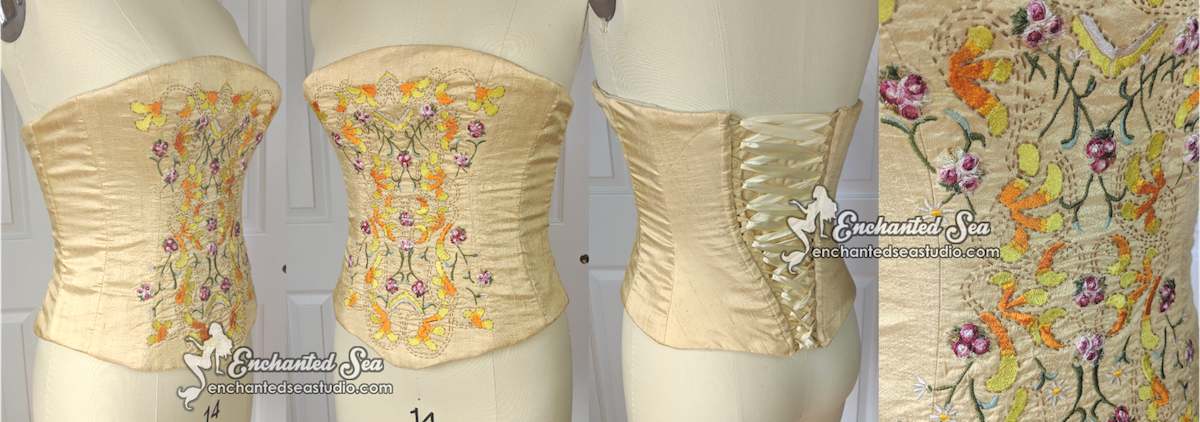
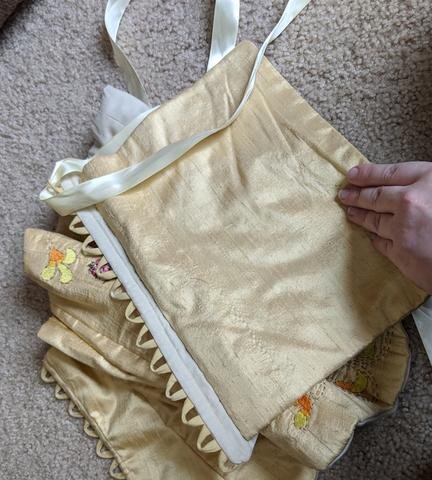
Outer corset without lining shown on mannequin.
I pinned and stitched around the left back, right back, and bottom of the lining and the outer corset, right sides together. After trimming any bulky areas that I was able to, and clipping corners, I turned the corset right-side-out and pressed it. I marked the ½” hem on the top of the lining, and the top of the corset.
I then pinned the top together, and blind-stitched the top closed by hand, apart from the very rear area near the lacing. I left a small opening there on each side. This was for the lacing bones. I machine stitched a channel along the corset/lacing edge, and inserted lacing bones on each side. Then, completely stitched those areas at the top of the corset.

After this, I constructed the modesty panel with the lining and put in my clothing tag. I hand-tacked the modesty panel into the back of the corset.
Even at the 11th hour I'll be extra.
I found a somewhat-matching ribbon (wish I could’ve gotten it closer!) to the corset, and used that for lacing. I ended up displaying and photographing it on a mannequin slightly larger, so the gap in the back is wider than it really is on the client. I did this because my better mannequin has more realistic arms, and it made the sleeves look less droopy and more how they appear on a human.
VI. Hair Accessories

Snoods
I found the snoods I used online from Lady MacSnood, at an extremely reasonable price. So instead of learning to knit, I purchased them for about $25 + shipping - very reasonable for a handmade item! She even customized the elastic color for me (I wanted it darker, rather than white, so it blended with the hair better).
Ribbons
I cut two yards of each color and finished off the ends with Fray Check for the hair accessory. I took them all in my hand and tied a bow in the center, which I had tacked down. Then, I hand-stitched it to a metal hair comb. It’s easily placed into the hair and very flexible as to where you can put it.

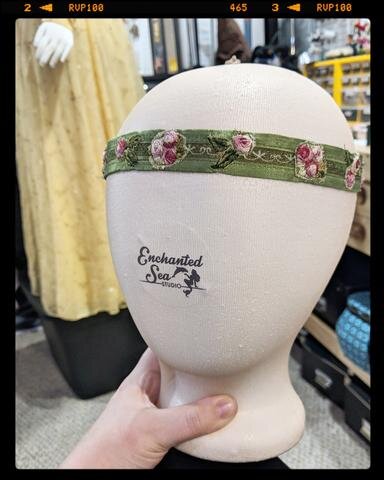
Headband
The headband was the more elaborate of the three. I couldn’t find an option that really looked like the replica headband - it kind of appears as a velvet ribbon trimmed on the sides and through the center. Instead, I utilized the vintage ribbons I had. I knew it would mesh well with the rest of the costume. I stitched a base and covered it in two strands of the mossy-colored ribbon. This ribbon is not used on the costume but is close to the colors of green on there. It’s closer in color to the real headband, and the greens used in the embroidery of the costume.
I used my green variegated thread to do some detailed stitch work on the base, just to give it a little something extra and make it less plain. I then cut many more pieces of roses from the excess shawl fabric and appliqued them onto the headband. To close the headband, I used small silver snaps at the rear. I wasn’t about to use more of the clear snaps. These would definitely be hidden amongst all the curly hair, so I didn’t feel bad about making them ultra-hidden.
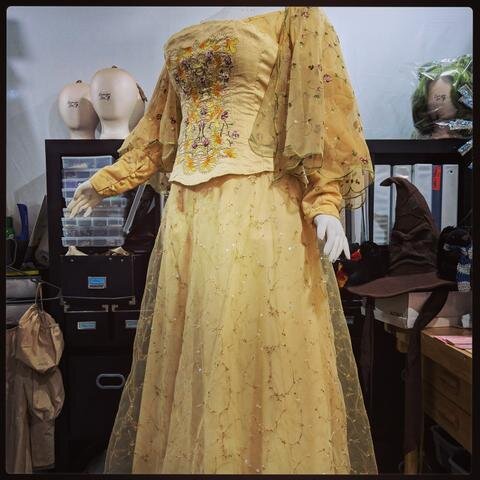
I was lucky enough to have my own Padme wig that I quickly (so quickly!) threw into a style and added the accessories to for photos. I’ll be ventilating a custom hairline on it and wearing the wig to SWCC with my water gown cosplay. (SURPRISE!)
Boy, I would’ve loved to try this Padme costume on, though! I’m a little too large in the bosom. I did do a skirt twirl, though. Very proud of how this one came out! Have a few things I’d tweak in the future (dye colors, trying to get it ever more perfect and close to the original) but I think I did a great job on this one. It’s much harder than I thought it would be. And I had Legion standards looming over my head that I wanted to conform to, for my client. (I’m crossing my fingers for her that it’ll get approved!)
More Stats:
Hours Spent on Sequins: ~55
Hours Spent on Dyeing: ~11
Hours of Hand Embroidery: ~9
Hours of Machine Embroidery: ~12 (not including all the planning & preparation)
Planning & Preparation & Digitizing Files, Lining Up Embroidery, etc: ~15-20 hours
Times I Went Insane Knowing I Had to Dye Something AGAIN: don’t make me even remember that….!